When placing images on your websites you might have to resize them to get the correct size image or correct aspect ratio. Within Click 2 Crop you can define presets so you can easily get images in the correct file size. Fanic can supply you with the definition files that you can add to Click 2 Crop.
Installing the software
You can download Click 2 Crop at
http://www.click2crop.com/ - click the download button, click 'setup exe file' and install the software.
Importing presets
When you open Click 2 Crop for the first time you have to import the definition files. This way you get the correct image sizes. Ask Fanic to create a definition file for you.
- Click the 'Presets' menu option.
- Click 'Edit presets menu...'.
- Click on the 'Remove Preset or Separator Line' button until the list is empty.
- Click on the '...' button.
- Click on 'Append Presets from file'.
- Select the file you've received from Fanic and click 'Open'.
- Click on the 'OK' button.
Once you've imported these presets you don't have to do this anymore in the future.
Resizing and cropping images
To create an image in the correct dimensions you can upload to the CMS you have to load it into Click 2 Crop.
- Click the 'File' menu option.
- Select 'Open Image...'.
- Select the image you want to prepare for your website and click 'Open'.
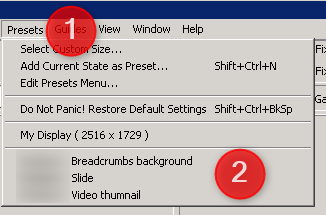
- Click the 'Presets' menu option.
- Select the image size you want to create by selecting one option from the menu.
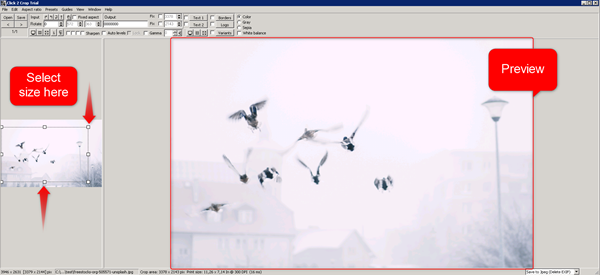
- Now use the white squares on top of the image in the left column to select the correct section of the image you want to use. You can see a preview on the right.
- When you are happy with the result, click the 'File' menu option
- Click 'Save crop...'. Set a filename and select a folder that you can locate when you upload the image to the CMS. Set 'Jpeg quality' to '60' and click 'Save'.
- That's it, now you can upload the image to the Media Library!